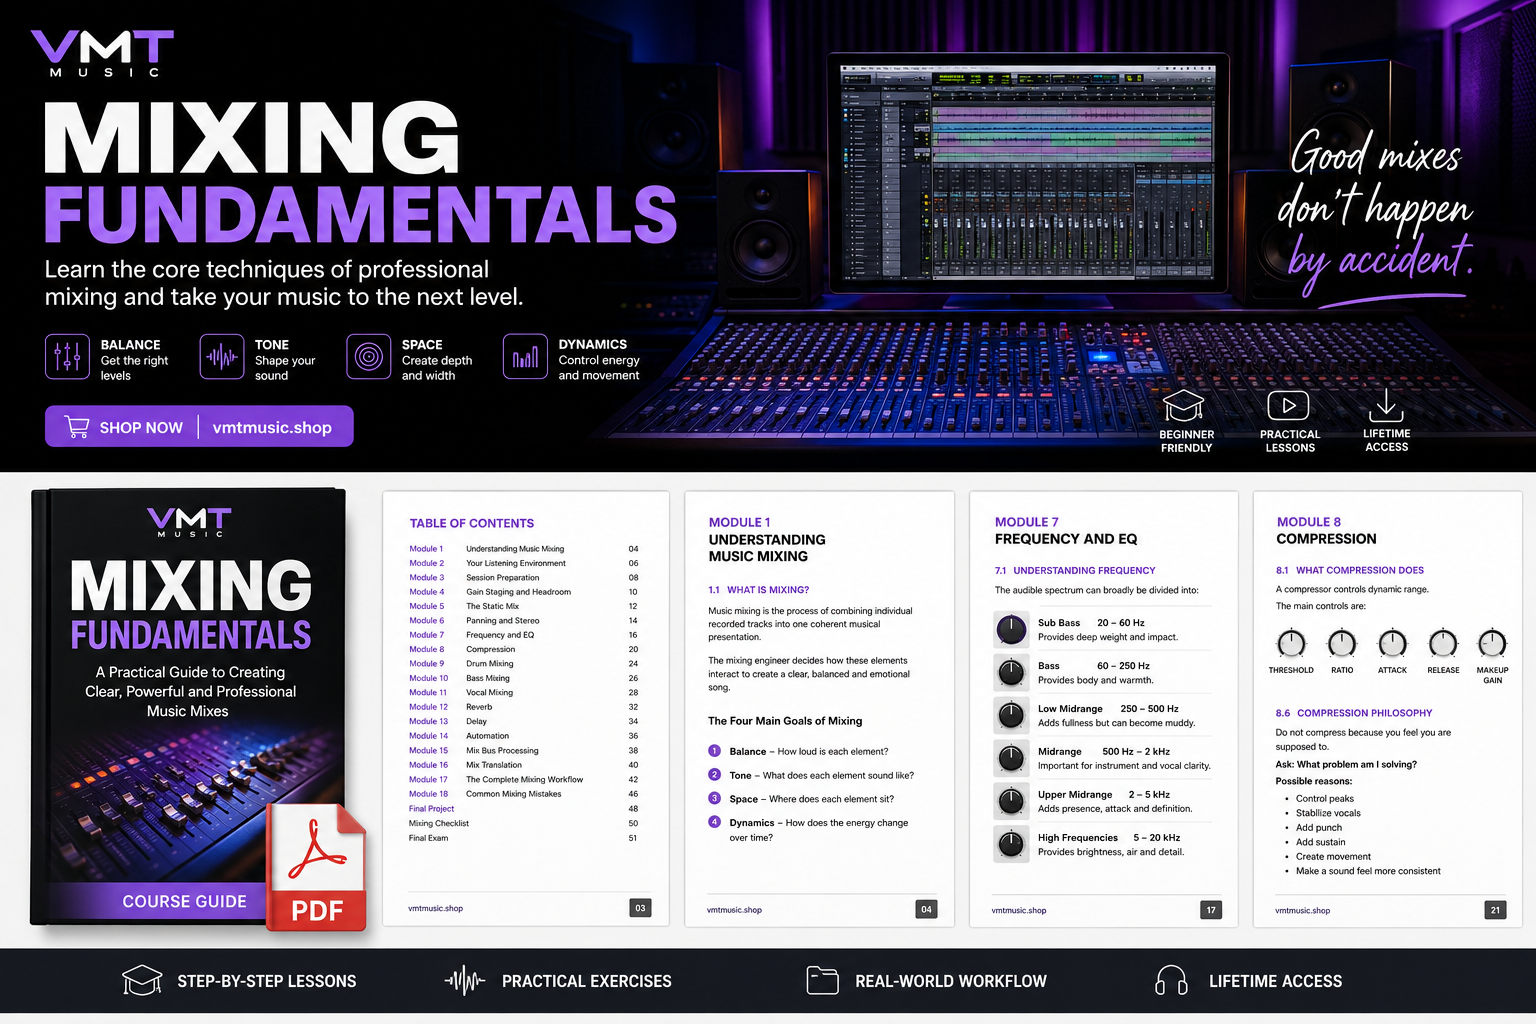
Description
Absolutely. I can create an original, complete “Mixing Fundamentals” course inspired by standard professional mixing principles—not copy the content of a proprietary VMT Music course.
I’d structure it as a practical beginner-to-intermediate course covering the same core skill areas found in established mixing curricula: balance, gain staging, EQ, compression, stereo imaging, reverb/delay, automation, and final mixdown. (Producertech)
MIXING FUNDAMENTALS
A Practical Guide to Creating Clear, Powerful and Professional Music Mixes
Course Level
Beginner → Intermediate
Course Goal
By the end of this course, you will be able to take a multitrack recording and turn it into a balanced, clear, punchy and emotionally engaging stereo mix using any modern DAW.
MODULE 1 — UNDERSTANDING MUSIC MIXING
Lesson 1.1 — What Is Mixing?
Music mixing is the process of combining individual recorded tracks into one coherent musical presentation.
A song may contain:
- Kick
- Snare
- Hi-hats
- Percussion
- Bass
- Guitars
- Keys
- Synths
- Lead vocals
- Background vocals
- Effects
- Ambience
The mixing engineer decides how these elements interact.
A good mix should allow the listener to understand the important musical elements while still feeling the emotion and energy of the song.
The Four Main Goals of Mixing
- Balance — How loud is each element?
- Tone — What does each element sound like?
- Space — Where does each element sit?
- Dynamics — How does the energy change over time?
MODULE 2 — YOUR LISTENING ENVIRONMENT
Lesson 2.1 — Critical Listening
Before touching a plugin, listen.
Ask:
- What is the most important element?
- What feels too loud?
- What feels weak?
- Is the vocal clear?
- Is the bass overpowering?
- Is the mix muddy?
- Is the stereo image balanced?
- Does the song become more exciting in the chorus?
Mixing is not primarily about using plugins.
It is about making decisions.
Lesson 2.2 — Reference Tracks
Choose one or two professionally mixed songs similar to your production.
Use references to compare:
- Vocal level
- Bass level
- Brightness
- Low-end weight
- Stereo width
- Dynamic movement
- Overall energy
Do not try to make your song identical to the reference.
Use it as a target for perspective.
MODULE 3 — SESSION PREPARATION
Lesson 3.1 — Organizing Your Session
Before mixing:
- Name every track.
- Remove unused tracks.
- Organize instruments into groups.
- Color-code tracks if useful.
- Route related instruments to buses.
- Check for unwanted noise.
- Check for clipping.
- Label effects returns.
- Save a new mixing version.
Example:
DRUMS
- Kick
- Snare
- Hi-hat
- Toms
- Overheads
- Percussion
MUSIC
- Bass
- Piano
- Guitar
- Synth
VOCALS
- Lead
- Doubles
- Harmonies
- Ad-libs
MODULE 4 — GAIN STAGING AND HEADROOM
Lesson 4.1 — Signal Levels
Gain staging means managing signal levels throughout your audio chain.
Avoid unnecessarily hot signals.
A healthy mix should have sufficient headroom so that processing does not constantly overload your channels or master bus.
Lesson 4.2 — Clipping
Digital clipping occurs when a signal exceeds the available digital level.
Clipping can produce unwanted distortion.
Watch your meters throughout the session.
Exercise
Create a new mix session.
Pull all faders down.
Then gradually bring your tracks up while monitoring the master bus.
Your objective is not maximum volume.
Your objective is clean, controlled signal flow.
MODULE 5 — THE STATIC MIX
Lesson 5.1 — Start With Volume
Before reaching for EQ or compression, create a static mix.
Use:
- Faders
- Pan controls
- Mute
- Solo
Try to make the song work using level and positioning alone.
This teaches you to solve problems at their source.
Lesson 5.2 — Identify the Core Element
Every song has important elements.
Examples:
- Pop → vocal
- Hip-hop → vocal + drums
- EDM → kick + bass + lead
- Rock → vocal + drums + guitars
Find the core element and build the mix around it.
MODULE 6 — PANNING AND STEREO
Lesson 6.1 — Understanding the Stereo Field
Panning allows you to position sounds between the left and right speakers.
Think of the stereo image as a stage.
For example:
CENTER
- Lead vocal
- Kick
- Snare
- Bass
LEFT / RIGHT
- Guitars
- Percussion
- Supporting instruments
- Background vocals
This is a guideline, not a rule.
Lesson 6.2 — Mono Compatibility
A mix that sounds wide in stereo can sometimes lose important information when summed to mono.
Periodically check your mix in mono.
Listen for:
- Missing instruments
- Weak vocals
- Thin bass
- Phase problems
- Major changes in tone
Exercise
Create two versions:
- Stereo
- Mono
Compare them and write down what changes.
MODULE 7 — FREQUENCY AND EQ
Lesson 7.1 — Understanding Frequency
The audible spectrum can broadly be divided into:
Sub Bass
Approximately 20–60 Hz
Provides deep weight and physical impact.
Bass
Approximately 60–250 Hz
Provides body and warmth.
Low Midrange
Approximately 250–500 Hz
Can provide fullness but may become muddy.
Midrange
Approximately 500 Hz–2 kHz
Important for many instruments and vocal intelligibility.
Upper Midrange
Approximately 2–5 kHz
Important for presence, attack and clarity.
High Frequencies
Approximately 5–20 kHz
Provides brightness, air and detail.
These ranges overlap and should not be treated as rigid rules.
Lesson 7.2 — Subtractive EQ
Before adding frequencies, ask whether another frequency is causing the problem.
For example:
If a vocal sounds muddy, you might reduce an unnecessary low-mid area rather than simply boosting the highs.
Lesson 7.3 — EQ for Separation
Two instruments can occupy similar frequency ranges.
Instead of making both louder, create separation.
Example:
Kick + Bass
If both dominate the same low-frequency area, decide which element should own particular parts of the spectrum.
Exercise
Take a kick and bass.
Create three versions:
- No EQ
- Kick-focused low end
- Bass-focused low end
Compare the clarity.
MODULE 8 — COMPRESSION
Lesson 8.1 — What Compression Does
A compressor controls dynamic range.
The main controls are:
- Threshold
- Ratio
- Attack
- Release
- Makeup gain
Lesson 8.2 — Threshold
The threshold determines when compression begins.
Lesson 8.3 — Ratio
A higher ratio produces stronger gain reduction once the signal crosses the threshold.
Lesson 8.4 — Attack
Attack determines how quickly compression responds.
A slower attack can allow more of a transient through.
A faster attack can control the initial hit more aggressively.
Lesson 8.5 — Release
Release determines how quickly the compressor stops reducing gain.
The wrong release can make a track feel unnatural or cause pumping.
Lesson 8.6 — Compression Philosophy
Do not compress because you feel you are supposed to.
Ask:
What problem am I solving?
Possible reasons:
- Control peaks
- Stabilize vocals
- Add punch
- Add sustain
- Create movement
- Make a sound feel more consistent
Exercise
Compress the same vocal three ways:
- Light
- Moderate
- Heavy
Level-match all three and decide which one best serves the song.
MODULE 9 — DRUM MIXING
Lesson 9.1 — Kick
Consider:
- Low-end weight
- Attack
- Click
- Relationship with bass
Do not judge the kick alone.
Judge it together with the bass.
Lesson 9.2 — Snare
Listen for:
- Body
- Crack
- Brightness
- Sustain
- Relationship with the vocal
Lesson 9.3 — Overheads and Cymbals
Overheads often contribute significantly to the overall character of the drum kit.
Avoid automatically making them extremely bright.
Lesson 9.4 — Drum Bus
Group drums together when appropriate.
A drum bus can help create a sense that the individual drum elements belong to the same performance.
MODULE 10 — BASS MIXING
Lesson 10.1 — The Foundation
Bass interacts heavily with the kick.
Ask:
- Which element dominates the lowest frequencies?
- Does the bass translate on small speakers?
- Is the low end stable?
- Does the bass disappear at lower listening volumes?
Exercise
Listen to your kick and bass:
- In stereo
- In mono
- Quietly
- At normal level
Make notes about what changes.
MODULE 11 — VOCAL MIXING
Lesson 11.1 — Vocal Level
The vocal is often the main storytelling element.
Start by finding the correct fader position.
Do not immediately add plugins.
Lesson 11.2 — Vocal EQ
Listen for:
- Unwanted low frequencies
- Mud
- Nasality
- Harshness
- Presence
- Air
Make small changes and listen again.
Lesson 11.3 — Vocal Compression
Compression can help stabilize vocal dynamics.
However, excessive compression can remove natural movement.
Lesson 11.4 — Background Vocals
Background vocals generally support rather than compete with the lead.
You can create separation through:
- Level
- Panning
- EQ
- Reverb
- Delay
MODULE 12 — REVERB
Lesson 12.1 — Why Use Reverb?
Reverb creates the impression of acoustic space.
It can make a sound feel:
- Close
- Far
- Large
- Small
- Dry
- Ambient
Lesson 12.2 — Reverb Parameters
Common controls include:
- Pre-delay
- Decay
- Size
- Damping
- Mix
- Early reflections
Lesson 12.3 — Send Reverb
Instead of placing separate reverbs on every track, create an auxiliary/send reverb.
Advantages include:
- Consistent space
- Better control
- Lower CPU usage
- Easier automation
Exercise
Create:
Reverb 1 — Short Room
Reverb 2 — Long Hall
Send your vocal to both.
Automate the amount throughout the song.
MODULE 13 — DELAY
Delay repeats an audio signal after a specified time.
Common uses include:
- Vocal throws
- Rhythmic effects
- Stereo widening
- Creating depth
- Filling gaps
Experiment with:
- 1/4 note
- 1/8 note
- Dotted 1/8
- Short slap delay
Always listen in musical context.
MODULE 14 — AUTOMATION
A great mix is rarely completely static.
Automation allows you to change parameters throughout the song.
Automate:
- Vocal volume
- Instrument volume
- Reverb sends
- Delay sends
- Effects
- Mutes
- Filter movements
Example
A vocal may need to be slightly louder during a dense chorus than during a sparse verse.
Instead of compressing it excessively, automation can help maintain musical balance.
MODULE 15 — MIX BUS PROCESSING
The mix bus is the final stereo path of the mix.
Possible processing includes:
- Gentle EQ
- Bus compression
- Saturation
- Limiting
Use caution.
The purpose is not to make the mix artificially loud.
Your processing should support the mix rather than hide problems inside it.
MODULE 16 — MIX TRANSLATION
A professional mix should work on different playback systems.
Test on:
- Studio monitors
- Headphones
- Earbuds
- Laptop speakers
- Phone speaker
- Car system
- Small Bluetooth speaker
Listen for:
- Vocal consistency
- Bass balance
- Harshness
- Stereo problems
- Excessive sub frequencies
- Missing details
If the mix only sounds good on one system, investigate why.
MODULE 17 — THE COMPLETE MIXING WORKFLOW
Use this workflow for your final project.
STEP 1 — Prepare
Clean and organize the session.
STEP 2 — Listen
Listen to the entire song without touching anything.
STEP 3 — Reference
Choose reference tracks.
STEP 4 — Gain Stage
Establish sensible signal levels and headroom.
STEP 5 — Static Balance
Build the mix with faders.
STEP 6 — Panning
Create the stereo arrangement.
STEP 7 — EQ
Correct problems and create separation.
STEP 8 — Compression
Control dynamics where necessary.
STEP 9 — Effects
Add reverb and delay to establish depth and character.
STEP 10 — Automation
Create movement and maintain balance.
STEP 11 — Mix Bus
Apply subtle processing only if needed.
STEP 12 — Translation
Check the mix on several playback systems.
STEP 13 — Final Review
Take a break and listen again.
STEP 14 — Export
Create the final stereo mix at the appropriate format and resolution for the intended delivery.
MODULE 18 — COMMON MIXING MISTAKES
Mistake 1 — Mixing Too Loud
High listening levels can make you underestimate harshness and fatigue.
Mistake 2 — Adding Plugins Too Early
A bad balance cannot always be fixed with processing.
Mistake 3 — Soloing Too Much
A sound can be beautiful in solo but wrong in the mix.
Make decisions in context.
Mistake 4 — Over-EQing
Large EQ boosts and cuts can create unnatural results.
Mistake 5 — Over-Compression
Compression should serve the musical purpose.
Mistake 6 — Excessive Stereo Width
A wider mix is not automatically a better mix.
Mistake 7 — Too Much Reverb
Too much reverb can reduce clarity and make the mix feel distant.
Mistake 8 — Chasing Loudness
A loud mix is not necessarily a good mix.
FINAL PROJECT
Mix a Complete Song
You will receive or create a multitrack project containing:
- Drums
- Bass
- Harmonic instruments
- Lead vocal
- Background vocals
- Effects
Your Assignment
Create a complete stereo mix.
You must demonstrate:
- Clean session organization
- Gain staging
- Static balance
- Intentional panning
- EQ
- Compression
- Reverb
- Delay
- Automation
- Reference-track comparison
- Mix translation
Deliverables
- Final stereo mix
- Instrumental mix
- Vocal mix
- Before/after comparison
- Short mixing notes explaining your major decisions
MIXING CHECKLIST
Before delivering a mix, ask:
- Is the song balanced?
- Can I clearly hear the lead vocal?
- Is the kick and bass relationship controlled?
- Are important instruments separated?
- Is the stereo image intentional?
- Does the mix work in mono?
- Are vocals stable?
- Is the low end controlled?
- Is there unnecessary mud?
- Is the high end harsh?
- Does the reverb support the song?
- Are delays musical?
- Does automation improve the arrangement?
- Does the mix translate to other systems?
- Have I listened after taking a break?
FINAL EXAM
Part A — Theory
Explain:
- What is gain staging?
- What is headroom?
- What does EQ do?
- What does compression do?
- What are attack and release?
- Why is panning important?
- What is reverb?
- What is delay?
- Why should you check a mix in mono?
- Why are reference tracks useful?
Part B — Practical
Mix one complete song without using a preset mix template.
The goal is not to use the most plugins.
The goal is to make the best musical decisions.
COURSE OUTCOME
After completing this course, you should be able to approach a multitrack session systematically:
Listen → Organize → Balance → Pan → EQ → Compress → Create Space → Automate → Check → Translate → Deliver
The most important principle is simple:
Mix for the song, not for the plugin.


Reviews
There are no reviews yet.